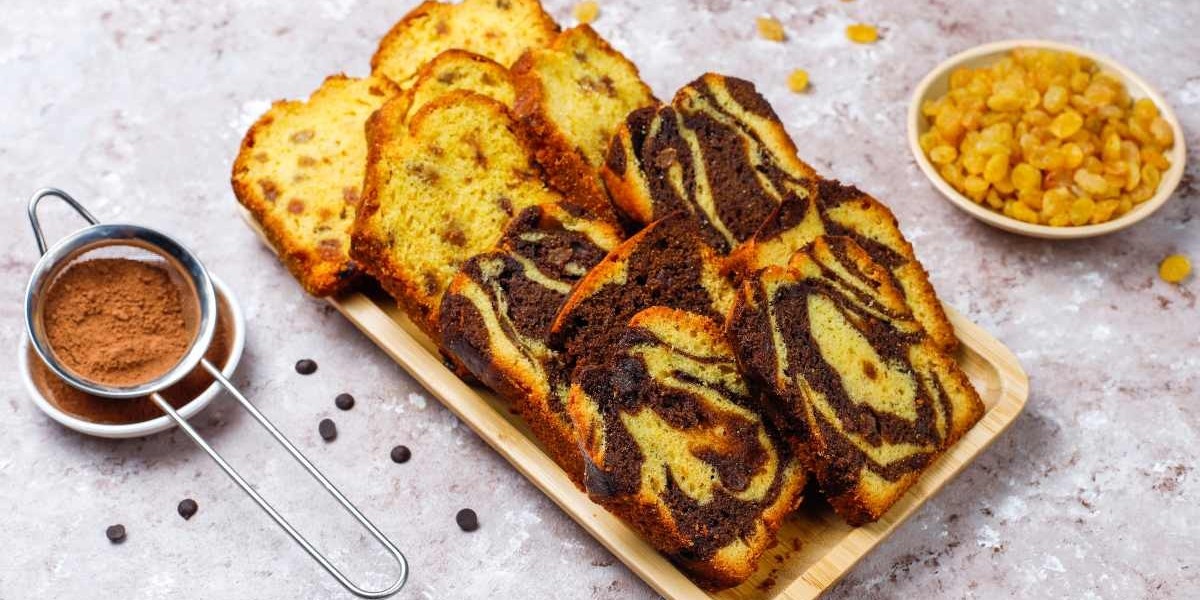

There is something almost magical about slicing into a cake and finding a swirl of chocolate and vanilla inside. Marble cake looks impressive, but it is one of the most forgiving bakes you can make. You need one batter, one small bowl for the chocolate portion, and a butter knife.
This marble cake recipe gives you a buttery vanilla base, a rich cocoa swirl, and a soft crumb that stays moist for days. It works for birthdays, tea time, potlucks, or a Tuesday when you just want cake. Below you will find the full method, the science behind each step, troubleshooting tips, variations, storage advice, and answers to the questions home bakers ask most.
Marble Cake at a Glance
Detail | Info |
Prep time | 25 minutes |
Bake time | 55–65 minutes |
Cooling time | 20 minutes in pan, then cool completely |
Total time | About 1 hour 45 minutes |
Serves | 12 slices |
Pan | 10-cup bundt or tube pan |
Difficulty | Beginner friendly |
Why This Marble Cake Recipe Works
Plenty of marble cakes look beautiful and taste dry. This one avoids that with a few deliberate choices:
Whole milk and softened butter create a tender, rich crumb without heaviness.
Room-temperature eggs blend smoothly, so the batter traps more air and bakes up lighter.
A warm milk and cocoa paste for the chocolate half keeps that portion moist. Cocoa is very drying, and adding liquid to it prevents the common problem of a dense chocolate layer.
Minimal swirling keeps the pattern defined. Over-mixing turns marble cake into muddy brown cake.
The result is a moist marble cake recipe that stays soft on day one, day two, and day three.
Marble Cake Ingredients
For the Vanilla Batter
2¾ cups (330 g) all-purpose flour
2½ teaspoons baking powder
½ teaspoon fine salt
1 cup (227 g) unsalted butter, softened
1½ cups (300 g) granulated sugar
4 large eggs, room temperature
1 tablespoon pure vanilla extract
1 cup (240 ml) whole milk, room temperature
For the Chocolate Swirl
⅓ cup (30 g) unsweetened cocoa powder
3 tablespoons granulated sugar
¼ cup (60 ml) warm whole milk
For the Pan
1 tablespoon softened butter and 1 tablespoon flour, or baking spray with flour
Optional Chocolate Glaze
½ cup (85 g) semi-sweet chocolate chips
¼ cup (60 ml) heavy cream
1 teaspoon butter
Ingredient Notes from the Kitchen
Butter: Use unsalted so you control the seasoning. It should be soft enough to dent with a finger but not greasy or melting, which is roughly 65°F (18°C).
Cocoa powder: Natural unsweetened cocoa gives a classic, slightly tangy chocolate flavor. Dutch-process cocoa gives a darker, smoother color. Both work in this cake.
Flour: Spoon it into your measuring cup and level it off. Scooping straight from the bag packs in extra flour and leads to a dry cake. If you have a kitchen scale, use the gram measurements.
Milk: Whole milk gives the best flavor. Low-fat milk works, but the crumb will be a little less rich.
How to Make Marble Cake: Step-by-Step Instructions
Step 1: Prep Your Pan and Oven
Heat the oven to 350°F (175°C) and place a rack in the center. Grease a 10-cup bundt or tube pan thoroughly, getting into every ridge. Dust with flour and tap out the extra, or use a baking spray that contains flour. A well-prepared pan is what lets the cake release cleanly.
Step 2: Whisk the Dry Ingredients
In a medium bowl, whisk together the flour, baking powder, and salt. Whisking spreads the leavening evenly, so the cake rises evenly.
Step 3: Cream the Butter and Sugar
In a large bowl, beat the softened butter and sugar with an electric mixer on medium-high speed for 3 to 4 minutes. The mixture should look pale, fluffy, and noticeably increased in volume. This step builds the cake's structure by whipping tiny air pockets into the fat.
Step 4: Add the Eggs and Vanilla
Add the eggs one at a time, beating for about 30 seconds after each. Scrape down the bowl, then mix in the vanilla. If the batter looks slightly curdled, do not worry. It will come together once the flour goes in.
Step 5: Alternate Flour and Milk
With the mixer on low, add the dry ingredients in three additions, alternating with the milk in two additions. Start and end with the flour. Mix only until you see no dry streaks. Over-mixing develops gluten, which makes a tough cake.
Step 6: Make the Chocolate Batter
Transfer about 1½ cups of the vanilla batter, roughly one third, to a medium bowl. In a small bowl, stir the cocoa, 3 tablespoons of sugar, and ¼ cup of warm milk into a smooth paste. Fold it into the reserved batter until fully combined and no cocoa streaks remain.
Step 7: Layer the Batters
Spoon alternating dollops of vanilla and chocolate batter into the prepared pan. Do not smooth them out. Keep placing them randomly, layering vanilla on chocolate and chocolate on vanilla, until all the batter is used.
Step 8: Swirl, Do Not Stir
Insert a butter knife or wooden skewer straight down to the bottom of the pan. Drag it through the batter in a slow "S" shape, moving around the whole pan once or twice at most. Resist the urge to keep going. Every extra pass blends the colors and softens the marbling.
Step 9: Bake
Tap the pan gently on the counter to release large air bubbles. Bake for 55 to 65 minutes, until a toothpick inserted in the center comes out clean or with a few dry crumbs and the top springs back lightly. If the top browns too fast, tent it loosely with foil for the last 15 minutes.
Step 10: Cool Properly
Let the cake rest in the pan for 20 minutes. This gives the structure time to set so it does not break when you turn it out. Run a thin knife around the edges, invert onto a wire rack, and cool completely before glazing or slicing.
Step 11: Add the Glaze (Optional)
Heat the cream until steaming, pour it over the chocolate chips, and let it sit for 2 minutes. Add the butter and stir until glossy. Drizzle over the cooled cake and let it set for 15 minutes.
The Science Behind a Great Marble Cake
Understanding why each step matters makes you a more confident baker.
Why Room Temperature Matters
Cold eggs and milk cause creamed butter to seize and separate. Room-temperature ingredients blend into a stable emulsion, and that emulsion holds air during baking. More trapped air means a lighter, fluffier crumb.
Why the Chocolate Portion Needs Extra Liquid
Cocoa powder absorbs moisture much like flour does. Adding warm milk to the cocoa lets it bloom, which deepens the chocolate flavor and keeps that half of the cake as tender as the vanilla half.
Why You Should Not Over-Swirl
Marbling relies on contrast. Each pass of the knife pulls the batters into thinner ribbons, and after a few passes they blur into a single color. Two slow passes give you the dramatic look bakeries achieve.
Why Oven Temperature Matters
A 350°F oven cooks the cake gently enough for the center to set before the outside dries out. Ovens often run hot or cold, so an inexpensive oven thermometer is worth having if your cakes brown unevenly.
Easy Marble Cake Recipe Tips for Perfect Results
Follow these tips and even a first-time baker can make an easy marble cake recipe look professional.
Measure accurately. Weigh ingredients when you can.
Do not open the oven door during the first 45 minutes. Sudden temperature drops can make the center sink.
Use the right amount of batter. The pan should be about two-thirds full.
Cool completely before slicing. Warm cake crumbles.
Wipe your knife clean between swirling passes if the batter builds up on it, so the colors stay separate.
Common Marble Cake Problems and Fixes
My Cake Is Dry
The usual culprits are too much flour, over-baking, or skipping the extra liquid in the cocoa mixture. Check the cake at 55 minutes, and measure flour by spooning and leveling.
The Colors Look Muddy
You swirled too many times. Next time, make just one or two slow passes through the batter.
The Cake Sank in the Middle
This can happen if the oven door was opened early, the oven was too cool, or the cake was under-baked. Confirm doneness with a toothpick before removing it.
The Cake Stuck to the Pan
Grease every crevice of the pan, including the center tube. If you are using a detailed bundt pan, a baking spray with flour is the most reliable option.
The Chocolate Layer Is Denser Than the Vanilla
You skipped the warm milk in the cocoa paste, or added too much cocoa. Stick to the measurements above.
Marble Cake Variations to Try
Once you have mastered the classic, these variations keep things interesting.
Classic Marble Cake Recipe Variation: Vanilla Bean and Dark Chocolate
Replace the vanilla extract with the seeds of one vanilla bean and use Dutch-process cocoa for a more dramatic, bakery-style contrast.
Orange Chocolate Marble Cake
Add the zest of one orange to the vanilla batter and 1 tablespoon of orange juice in place of some milk. Chocolate and orange are a natural pairing.
Mocha Marble Cake
Dissolve 1 teaspoon of instant espresso powder in the warm milk before mixing it into the cocoa.
Sour Cream Marble Cake
Swap ½ cup of the milk for sour cream for an even richer, denser crumb.
Marble Loaf Cake
Bake the batter in two 9x5-inch loaf pans for 45 to 55 minutes. This is a convenient option for gifting.
Marble Cupcakes
Fill cupcake liners two-thirds full, swirl gently, and bake at 350°F for 18 to 22 minutes.
Egg-Free or Dairy-Free Adaptations
For dairy-free, use plant-based butter and unsweetened oat or soy milk. Results vary by brand, so test before baking for an event.
How to Serve Marble Cake
Marble cake is versatile enough for almost any occasion:
Plain and dusted with powdered sugar for an afternoon coffee cake
With chocolate glaze for a birthday or celebration
With fresh berries and whipped cream for a lighter dessert
Warm with a scoop of vanilla ice cream for an easy plated dessert
Toasted with butter the next morning, if you have any left
Looking for more cake inspiration to round out a dessert table? Try our moist lemon cake for a bright citrus option, or our classic pound cake for another buttery favorite.
How to Store Marble Cake
Room temperature: Cover tightly or store in an airtight container for up to 3 days.
Refrigerator: Refrigerating can dry cake out, so only do it if the cake has a perishable frosting or filling. Bring slices to room temperature before serving.
Freezer: Wrap the cooled, unglazed cake in plastic wrap, then foil, and freeze for up to 3 months. Thaw overnight on the counter.
Marble Cake vs. Other Classic Cakes
Marble cake often gets compared with other butter and sponge cakes. Here is how it fits into your baking lineup.
Marble cake vs. pound cake: Pound cake is denser and relies on equal parts butter, sugar, eggs, and flour. Marble cake is lighter, thanks to baking powder and milk, and adds a chocolate swirl.
Marble cake vs. banana bread: Banana bread gets its moisture from fruit and is usually a quick bread, mixed with a spoon rather than creamed. If you are in the mood for something fruit-forward, our fluffy banana bread is a good next bake.
Marble cake vs. strawberry cake: Strawberry cake uses fruit for flavor and color, while marble cake gets its look from two batters. For a fresh, fruity option, see our homemade strawberry cake.
Marble cake vs. tres leches: Tres leches is a sponge soaked in three milks and served cold, with a completely different texture. If you enjoy milk-based desserts, try our tres leches cake.
Tools That Make Marble Cake Easier
You do not need special equipment, but these tools help:
Bundt or tube pan (10-cup): Gives even baking and a beautiful shape.
Electric mixer: Makes creaming quick and consistent.
Kitchen scale: The most reliable way to measure flour.
Butter knife or skewer: For swirling.
Wire cooling rack: Prevents a soggy bottom.
Oven thermometer: Confirms your oven is truly at 350°F.
Nutrition Snapshot (Approximate, Per Slice)
Based on 12 slices without glaze, a slice contains roughly 380 calories, 18 g fat, 50 g carbohydrates, and 6 g protein. Values vary by ingredients and brands, so use a nutrition calculator if you need precise numbers for dietary planning.
Why Bake at Home? The Case for a Homemade Marble Cake
A homemade marble cake beats most store-bought versions for three reasons. First, you control the ingredients, with real butter, real vanilla, and no preservatives. Second, the flavor is fresher, since cake is best within a day or two of baking. Third, it costs far less than a bakery cake and uses ingredients you probably already have. If you are just starting your baking journey, this is one of the most rewarding first cakes to learn.
Beginner-Friendly Simple Marble Cake Recipe Checklist
If you are new to baking, use this quick checklist for a simple marble cake recipe that works every time:
Take butter, eggs, and milk out 30–60 minutes ahead
Preheat the oven and prepare the pan
Whisk the dry ingredients
Cream butter and sugar until pale and fluffy
Alternate flour and milk, mixing gently
Separate one third of the batter and add the cocoa paste
Layer dollops of batter in the pan
Swirl once or twice only
Bake until a toothpick comes out clean
Cool in the pan for 20 minutes before turning out
Fluffy Marble Cake Recipe Secrets
If fluffiness is your top priority, these small changes make a noticeable difference. Sift the flour and baking powder together for a finer texture. Beat the butter and sugar for the full four minutes. Make sure your baking powder is fresh, since it loses potency after about six months. Finally, fold the flour in gently rather than beating it hard. Each of these habits protects the air you worked into the batter.
Final Thoughts
A great cake does not need to be complicated. With softened butter, a couple of bowls, and a butter knife, you can bake something that looks like it came from a bakery and tastes like home. This marble cake recipe rewards patience in just a few places: creaming the butter well, using room-temperature ingredients, and swirling with restraint.
Here is your action plan. Pull your ingredients out early, measure your flour carefully, layer the batters without smoothing them, and swirl only once or twice. Then let the cake cool before slicing. Bake it this weekend, take a photo of the swirl, and tag us with your results. We love seeing how your bakes turn out.
Frequently Asked Questions
What is the secret to a moist marble cake?
The secret is using enough fat and liquid and not over-baking. Softened butter, whole milk, and warm milk in the cocoa paste keep the crumb tender. Check for doneness at 55 minutes, because even five extra minutes can dry a cake out.
How do you get a good marble pattern in a cake?
Alternate dollops of vanilla and chocolate batter, then drag a knife through the batter in one or two slow "S" motions. Fewer passes give sharper, more defined swirls.
Can I make marble cake without an electric mixer?
Yes. Cream the butter and sugar by hand with a wooden spoon for about 8 to 10 minutes. It takes effort, but the cake will still turn out well.
Can I bake marble cake in a loaf pan or round pan?
Yes. Use two 9x5-inch loaf pans (45 to 55 minutes) or two 9-inch round pans (30 to 35 minutes). Start checking early, since smaller pans bake faster.